QuickStart - Cutscenes
As you saw on our previous Quickstart tutorial, PACgd readily gives you the components needed to create a Point and Click game. However, what is a P&C game without dialogues? In this tutorial we will see how PACgd helps you to create Cutscenes and ues.
Table of contents
Import PACgd Quickstart - Cutscenes
Download the PACgd example projects and extract its content into a folder in your computer. Then, import the project “Cutscenes” in Godot.
Understanding the Scene
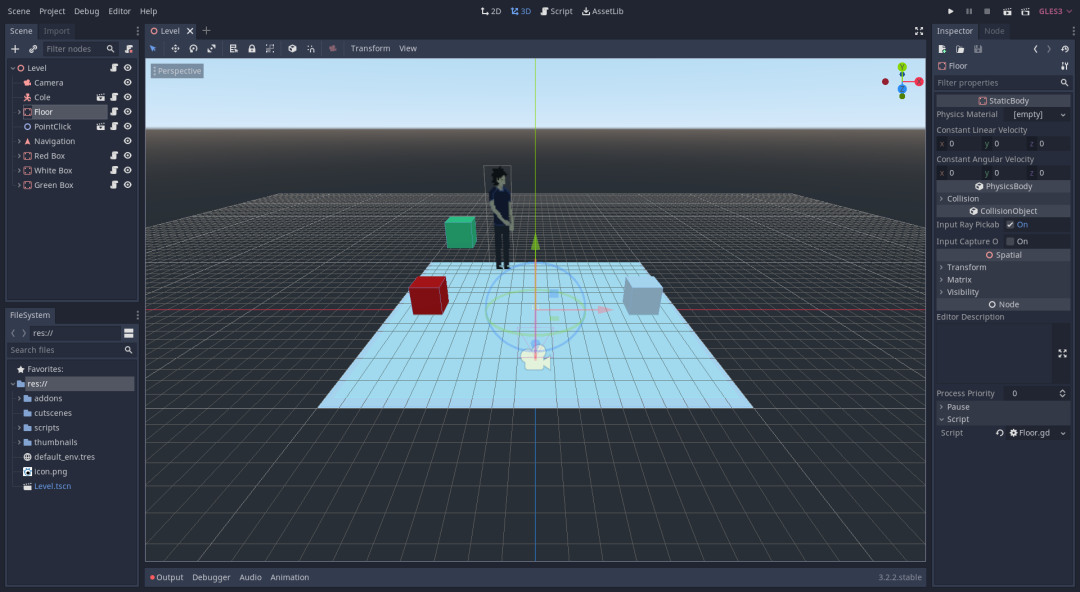
Once the project is imported, Godot will open and you should see a scene with a Character named Cole, and three boxes: Red Box, Green Box, and White Box.
Before we dig into the scene and its components, play the game! Press F5 or the play button on the top-right corner. You will notice that this time Cole automatically starts to talk, move, and that a choice appears. After exploring the possibilities, and piling the boxes, come back and we will guide you through the code.
The Objects
The objects in this scene are mostly the same as in our Quickstart tutorial, with the sole addition of the Green Box
The Cutscenes
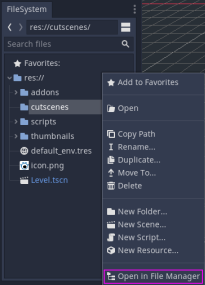
The main addition of this project are the files in the cutscene folder. To see them, make right-click in the cutscene folder, on the FileSystem tab, and click in Open in File Manager.
You will find two files: Intro.txt and Outro.txt. These plain-text files represent Cutscenes. Cutscenes are a special type of script we have designed for PACgd. They offer a simple way to write complex cutscenes and dialogues between characters. In a Cutscene Characters can walk around, take objects, and talk with each other. Also, Cutscenes can change depending on some external conditions, or choices presented to the player.
Lets look at the content of Intro.txt:
cole say: Hi, welcome to this example on how to use our plugin

cole set: name Cole

if: cole.name == "Cole"
	cole say: My name is {cole.name}
else:
	cole say: My name is {cole.name}, somebody changed my name!

cole walk_to: white_box

cole say: Do you have any questions?

choice: Do you have any questions?
	option: How can I learn more about the framework?
		cole say: Check the documentation!
		cole say: Also, did you know that you can make multiple choices?

		choice: Did you know?
			option: I did not
				cole say: Really?
			option: I changed your name	if: cole.name != "Cole"
				cole say: I see you did
			option: I knew it!
				cole say: Perfect
				finish

	option: What am I supposed to do here? if: cole.name == "Cole"
		cole say: Interact with the boxes, put the red on top of the white one
		cole say: Any other question?
	option: No, thanks!
		cole say: Perfect! Now you can play
		cole say: Don't forget to check the code later
		finish
If you read it, you will notice that:
- It describes what Cole did when you played the game, and the choices you were presented with!
- It uses a friendly language!
We made Cutscene to simplify automatizing actions in the game, while allowing to create complex dialogues and choices. Check the CutScene documentation to see all that can be done in a Cutscene.
Change the line cole set: name Cole and give Cole a different name, and see how the game changes when you play it again. Then come back and we will show the code necessary to run the Cutscenes in a game.
The Code
Level
In terms of code, the main difference with respect to the Quickstart tutorial is the addition of the following code in our Level Node:
var name_to_object = {"cole": $Cole,
		      "white_box": $"Boxes/White Box",
		      "red_box": $"Boxes/Red Box",
		      "green_box":$"Boxes/Green Box"}
$PointClick.init($Cole, name_to_object)

# When the game starts, we play the intro CutScene
$PointClick.play_scene("res://cutscenes/Intro.txt")
The dictionary name_to_object allows to translate each line in the CutScene into Nodes in the Scene. In this way, we know that cole in the CutScene is the Node $Cole in our Godot Scene.
The last line commands the PointClick system to play the scene. When a Cutscene starts the PointClick system disables all the inputs from the player.
Boxes
The code in the boxes is quite similar to that of our Quickstart tutorial. Perhaps the most interesting addition is in the White Box which includes the commented line who.call_function_from(self, "play_outro"). If you uncomment the line, after piling the red box, Cole will call the function play_outro from the White Box, which in turn will play the Outro.txt scene.
As you can see, CutScenes can be started from any object by simply invoking the method PointClick.play_scene(filename).